DMS Table Setup
In the "DMS M-Files table setup," the master and process data, which are to be replicated in the form of M-Files objects, are created and metadata mapping is carried out. In addition, document classes can be defined per table setup and per Business Central table, which can be uploaded to the DMS drop form of the respective table or via report archiving.
New M-Files Table Setup
Follow the steps below to configure a new vault setup.
-
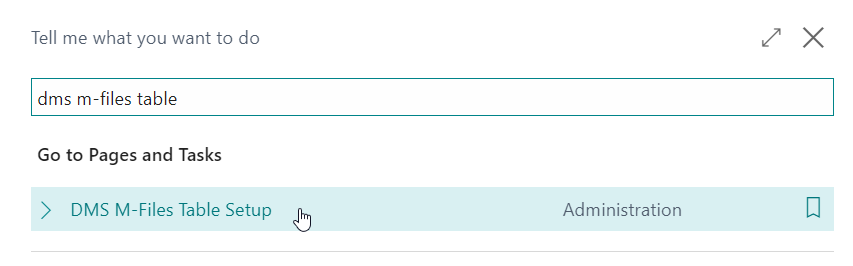
Enter "DMS M-Files table setup" in the search and click on the corresponding hyperlink.
-
Click on [New] in the navigation bar.
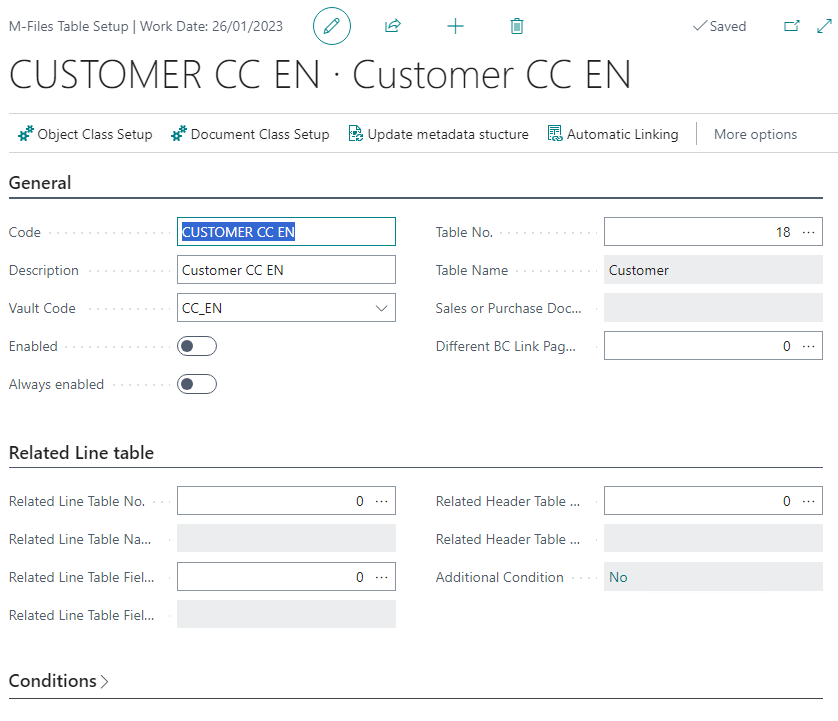
General tab
Perform all steps!
- Code: Enter a unique code for the table you want to replicate to M-Files.
- Sequence No.: Determines the processing order of table setups by the DMS jobs — lower sequence numbers are processed first.
- Description: Enter a description.
- Vault code: Select a vault setup. This is where the M-Files objects are created and documents are uploaded.
- Enabled: Once the code of a table setup has been stored in the "Parameter string" of job 5371117, and the table setup has been set to active in this field, the job takes this setup into account for triggering object uploads. Whenever a change is made to the table setup, this field is set to inactive. When closing the setup, the user is asked whether they want to reactivate it. (see Inserting DMS jobs in task queue (DMS connector setup))
- Always enabled: If this field is enabled, the table setup will not be set to inactive anymore if a change has been made in the setup.
- Table no.: Select from the list the Business Central table that you want to use for replicating records and archiving documents in M-Files.
- Sales or Purchase Document Type: If the table you want to set up is the sales header (Table 36), the purchase header (Table 38) or the service header (Table 5900), you must specify the respective document type (Quote, Order, Invoice, etc.) of the desired table.
Related Line Table tab
Perform the steps below if you want to use information from the table row for indexing in M-Files.
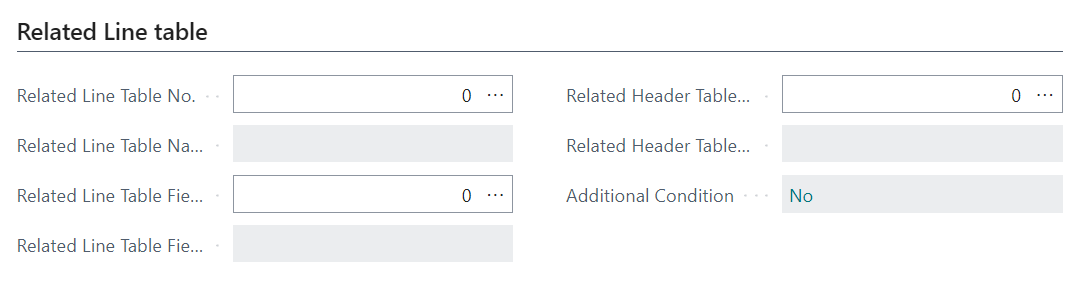
- Related Line Table No.: Enter the number of the line table you want to use for indexing.
- Related Line Table: Displays the name of the table stored in the "Associated Line Table No." field.
- Related Line Table Field No.: Here, the associated field number of the line table must be specified.
- Related Line Table Field Name: Displays the name of the table stored in the "Associated Line Table Field No." field.
- Related Header Table Field No.: Here, the associated field number of the header table must be specified.
- Related Header Table Field Name: Displays the name of the table stored in the "Associated Line Table Header No." field.
- Related Condition: Here, additional conditions for the line table can be specified based on filter criteria.
Conditions tab
Define filters for the table setup or replication of objects in M-Files.
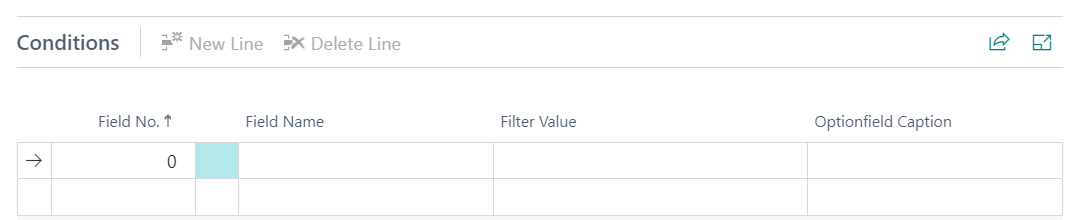
In the conditions, you can specify filter criteria based.
Actions
Object Class Setup
Perform steps below sequentially!

In the object class setup, one or more M-Files object types can be stored. Filter criteria and metadata can be stored for each class, which will be considered for object creation in M-Files.
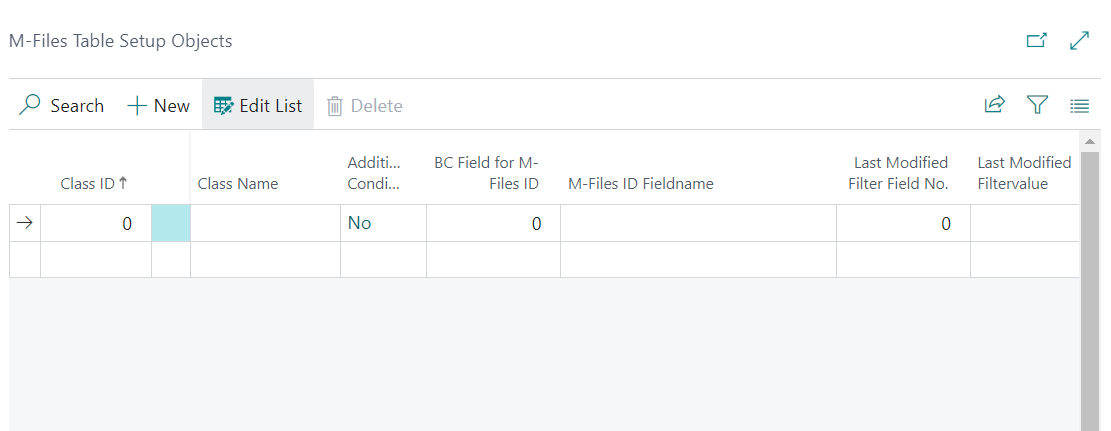
- Class ID: Select your object class from the list of classes available in the M-Files vault.
- Class name: The class name is automatically filled based on the class ID.
- Additional condition: Here, an additional condition for the object class can be stored.
- BC field for M-Files ID: Here, you set the field number of the Business Central table that should be used for the object ID in M-Files. Since the object ID in M-Files must be unique, the primary key of the respective table should be used for this (e.g., number or code).
- M-Files ID field name: This field is automatically filled based on the BC field.
- "Last modified" filter: If necessary, a "last modified" filter can be set if a field of this type is available in the table. Under this condition, the current date is set as the filter after each job run, so that the job does not always run over all records but only considers those that fall into the date filter. This increases the performance of the jobs.
- Number of objects per run: How many objects should be created or updated by the job at once per run. It makes sense to limit the number in order to reduce the runtime of the job.
The result of the object class setup is that the configured objects are created dynamically in M-Files as soon as a document is stored via the drop form or by the 5371117 "DMS Create ObjectsTDMS" job:
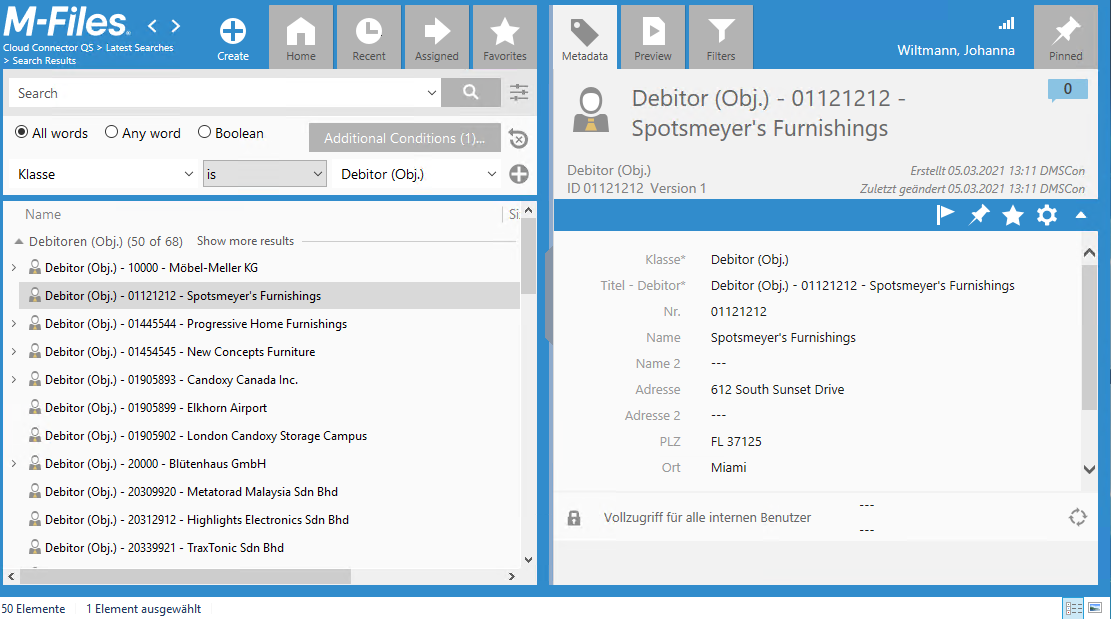
The content of the Business Central field BC field for M-Files ID becomes the object ID of the object in M-Files. The object was created and last changed by the user who was defined for the DMS Connector in the Vault setup.
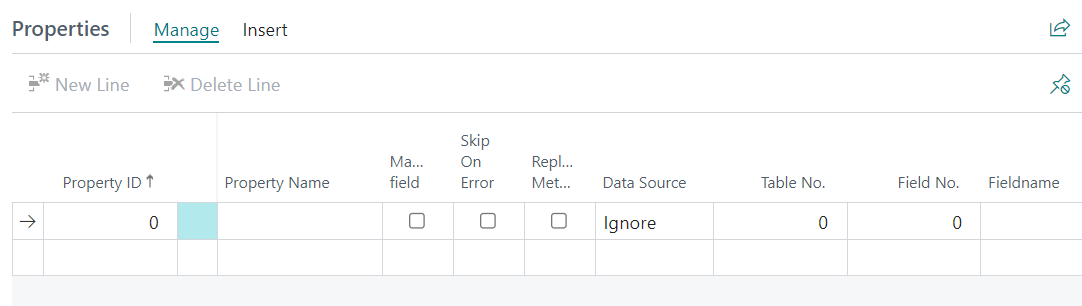
Mapping M-Files properties
Perform the following steps to perform the mapping of M-Files properties and Business Central fields.
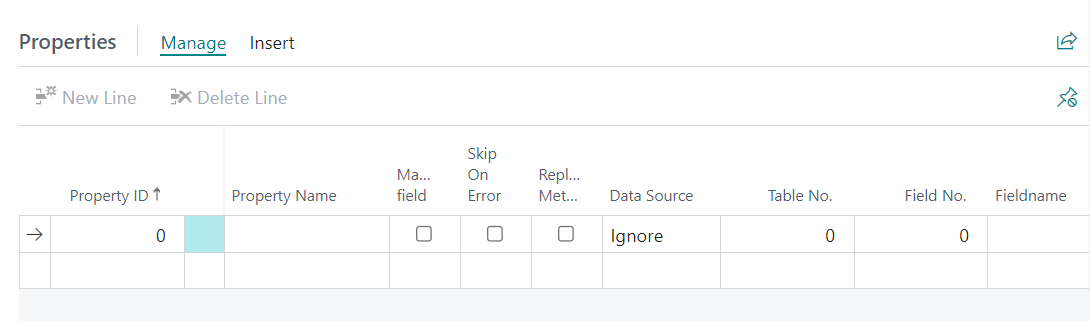
Perform the mapping line by line or property by property.
- Property ID: Unique ID for the property (property definition) in M-Files.
- Property name: Automatically set based on the property ID.
- Required: Indicates whether the property is a mandatory field in the class.
- Skip on error: Not activated by default. If an error occurs during the upload of this record, this error is ignored, and the whole record or M-Files object is created.
- Replace metadata: If this field is enabled, and the data type is a multi-select field, all existing selection elements of this field in M-Files will be deleted, and only the passed element will be set. If the data type is yes/no, date, text, BC lookup, or value list, the specified default value is set if one exists and if the current field is empty.
- Data source: Select the data source (for more details, see the info box) for the property to be linked.
Note
The default value of the "Data source" field when mapping M-Files properties is "Ignore".
- Table number: Automatically pulled based on the table from the header of Business Central.
- Field number: Now, select the Business Central field that you want to "map" with the M-Files property.
- Field name: Automatically pulled based on the field number.
- Search property: A property can be set where the ID of the object is not known. In this case, the search property searches for a property on the object that uniquely identifies the object. E.g., vendor/purchaser objects based on the vendor/purchaser name.
Document Class Setup
Within an M-Files table setup, you have the option to store one or more document classes that are intended for uploading files via the drop form or for report archiving.

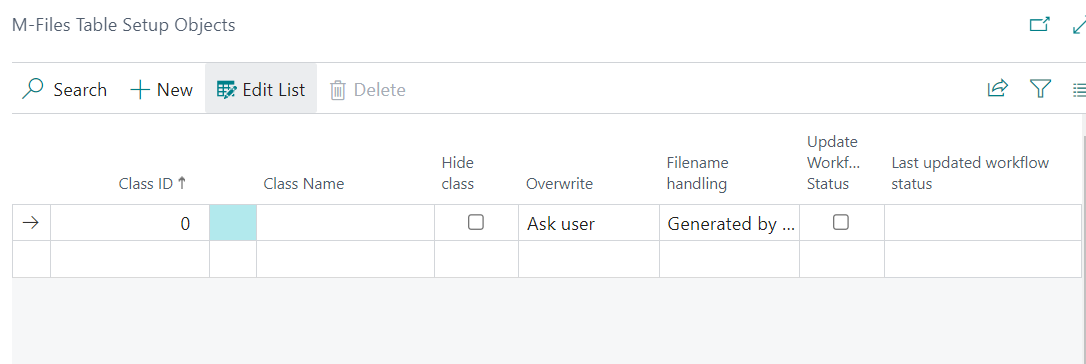
To store a document class,
- Class ID: Enter the ID of the M-Files document class that you want to link here. Alternatively, select the corresponding class from the drill-down menu.
- Class name: This field automatically displays the name of the selected document class.
- Hide class: This function controls whether a document class can be linked to a Business Central table, such as through report archiving, but is hidden from the DMS drop form for filing.
- Overwrite: This controls the behavior when a file with the same name is dropped onto the drop form of a Business Central table for a second time. The file can either be overwritten, uploaded as a new file, or the user can be prompted for an action.
- Filename handling: This controls how the filename of the document is assigned. You can specify that the filename is generated by M-Files. When a document is dropped onto the form, the displayed name in the fact box is updated based on the document title in M-Files as soon as the file is uploaded. If you select "Modifiable by user", the file name can be changed via the document card. If "Filename is not modifiable" is selected, no changes are made to the file name.
- Permission exists: If there are individual permissions for this class, they are displayed here. See class permissions.
- Update workflow status: This controls whether the workflow status of the document class in M-Files should be transferred to Business Central. The workflow status is then visible on the DMS fact boxes for the document.
Following this, as in the Object Class Setup, the mapping between BC fields and M-Files properties can take place. The M-Files properties are automatically displayed based on the specified classes. If a property changes in M-Files or a new property is added, the metadata structure must be updated through the vault setup before the class properties can be set up in the document class setup:
Class permissions
Individual permissions can be assigned to classes. This allows you to control which groups or individuals are permitted to view, delete, or upload documents in this class.
- Type: A distinction is made between "Team", "User" and "All" permissions.
- Permission Code: Depending on the selection of the permission type, a DMS team, a DMS user, or a BC security group can be stored here.
- Permission Name: Displays the team, user, or security group name.
- Read: Documents of the class are displayed in the fact box.
- Delete: Deleting documents of the class is permitted.
- Upload: Uploading documents to this class is permitted.
- Change Class: Changing documents to another configured class is permitted.
Determining permissions
If no explicit permissions are defined for a class, the default permissions apply. These allow all users to read the class and upload documents, but do not allow them to delete documents. Once explicit permissions have been defined, only the teams or users defined in the permissions list have access to the class.
Effective permissions are determined according to the following priority:
- User permission
- Security group permission
- Team permission
- "All" permission
If a user is assigned to multiple teams, the highest permission is taken into account. Example: Team A has "Read" permission, Team B does not have this permission. If a user is a member of both teams, they may read documents in this class.
All permissions can be overridden via the "DMS Admin" settings in the DMS user setup.
Automatic Linking
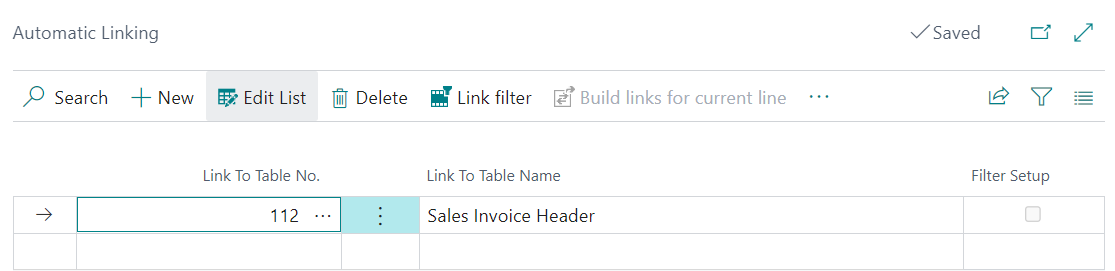
Through automatic linking, uploaded files can automatically be displayed with data records from other tables that they are linked to. For example, uploaded documents should be displayed on a booked sales delivery and also on the corresponding sales order. This setup is now explained by way of example.
For the setup, the table setup is selected where the files are to be uploaded. By opening the [Automatic Linking] action, a list is opened. Here, the table is specified with which the record is to be linked.
Link Filter
This action can be used to filter for which record the files should be displayed.
Create links for current row
This action creates the links of the already existing documents for the currently selected row.
Create links for all rows
This action creates the links of the already existing documents for all linking setups in this list.
Setting up automatic links
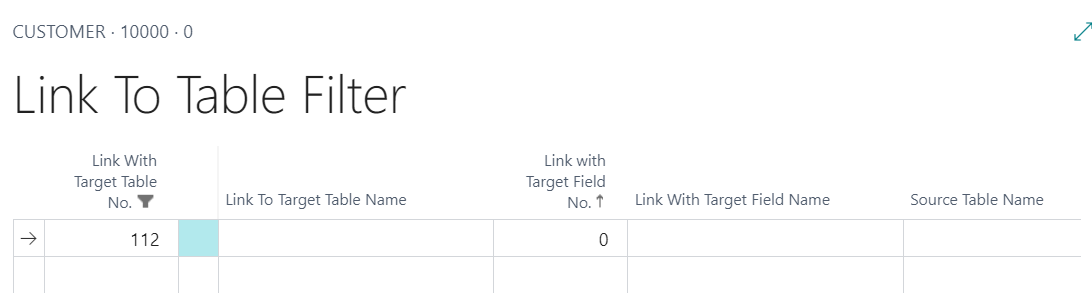
To set up a filter, follow these steps:
- Link with target table No.: This table number is pre-set and comes from the previous setup.
- Link to target table name: The table name of the table to be linked is automatically displayed here.
- Link with target field No.: This field identifies the record in the target table.
- Link with target field name: The field name of the field to be linked is automatically displayed here.
- Source table name: The table name of the current table setup is automatically displayed here, from which the document is to be linked.
- Link with source field number: This field establishes the reference to the record in the target table from the table of the current table setup.
Infobox: Data sources
| Data source | Explanation |
|---|---|
| BC table | BC table means that the selected M-Files metadata is populated by a specific Business Central field during upload. |
| Ignore | Ignore means that the M-Files metadata is not populated by a specific Business Central value during upload. |
| Document table | Uses information from the file being uploaded, such as the "Created on" or "Filename" properties. |
| BC table row | Retrieves information from a table row. The table number changes to the row table accordingly. The requirement is that the "Related row table" register has been filled out. |
| Filename | The filename of the file is used to populate the property. |
| Text | Manual freetext can be entered that will be written to the corresponding property. |
| Date | A date can be entered that will be written to the corresponding property. A date picker helps with selecting the date. |
| Yes/No | A Yes/No (Boolean) value can be selected. |
| BC Lookup | This source allows the user to perform a lookup on another Business Central table and select a value there. The additional filter setup is described here. |
| BC Link | A BC link is created, allowing the BC record to be opened from M-Files. |
| Value list | An M-Files value list can be selected. From this list, the user can select a value. |
| BC Ext. Lookup | The extended BC Lookup can be used to automatically retrieve data from a third table - a table that has no direct connection to the source table - and write the data to the corresponding metadata. The setup is described here. |