Overview
General Information
With the installation of the DMS Connector, the following FactBox will be available to you after completing the relevant configuration of the table setup:
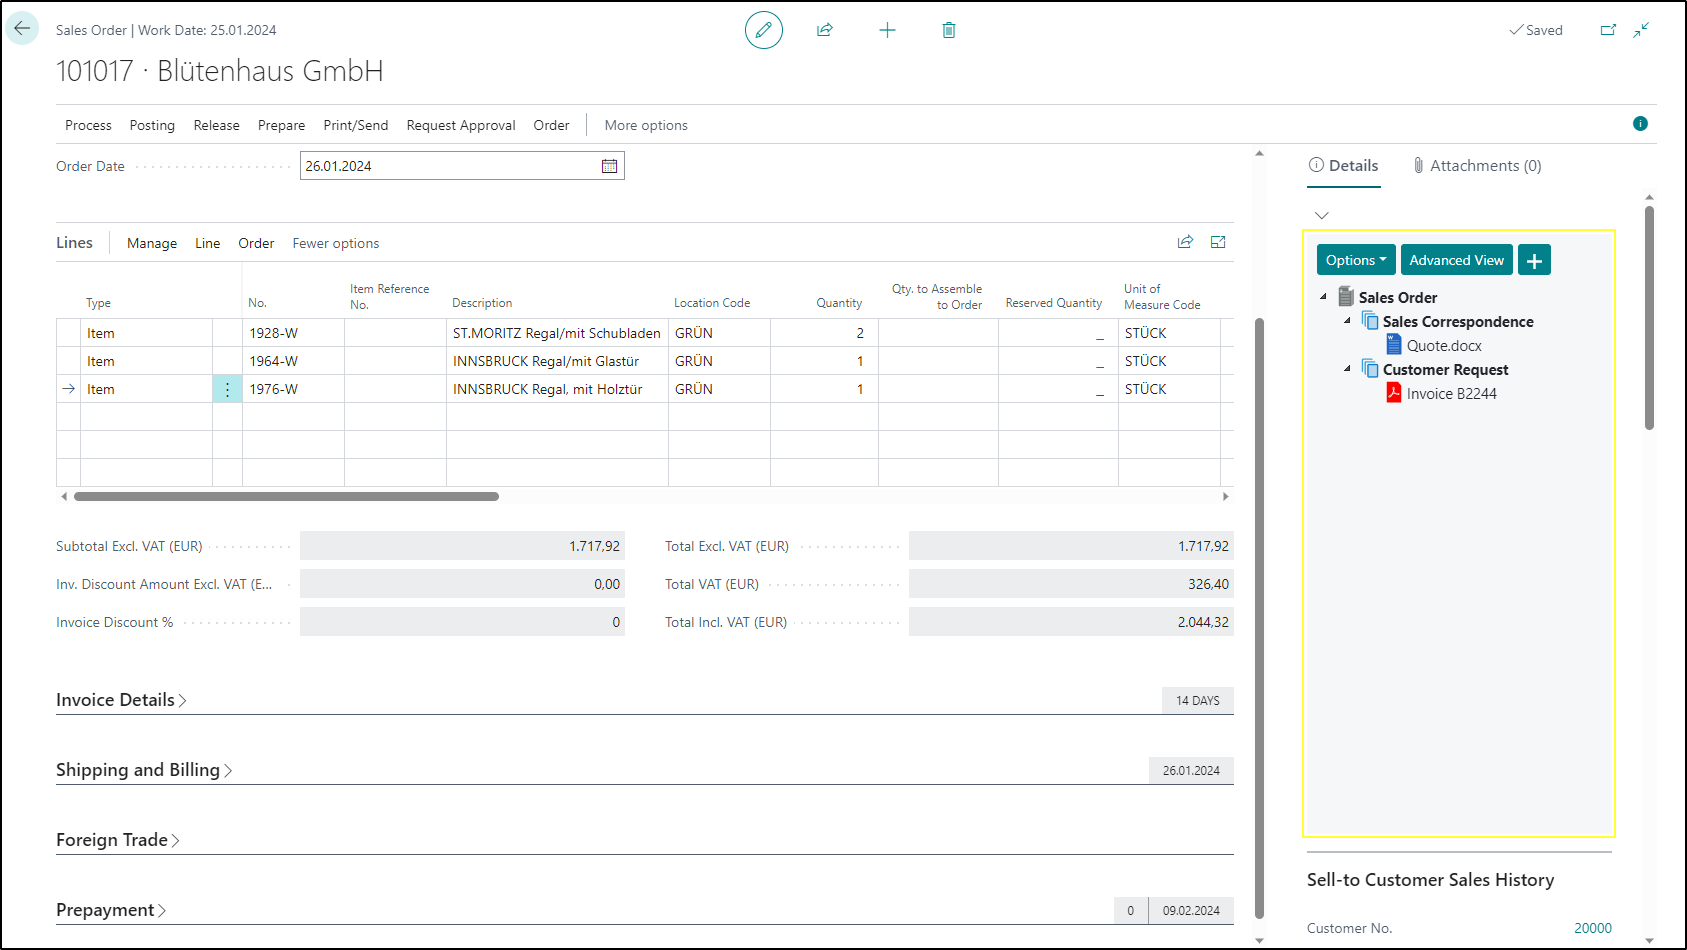
The FactBox (also called DropForm or InfoBox) contains the DMS documents. This area can be used to drag and drop files into SharePoint. In Business Central, only the hyperlink, accessible via the card view, remains. The corresponding metadata is based on the respective data set the user has selected (e.g., the corresponding sales order from Blütenhaus GmbH in the image below).
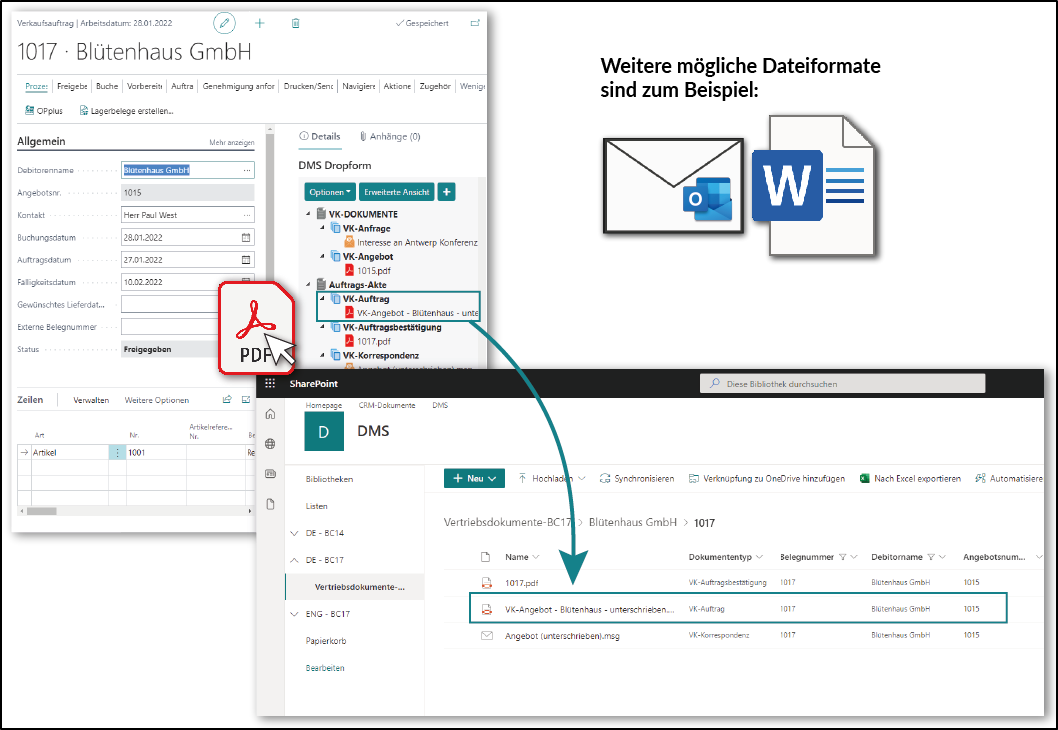
The DMS FactBox lists all documents that have already been uploaded. New documents can be sent to your SharePoint via drag-and-drop or via the plus symbol as well as via the Business Central functions Print, Release & Post (configurable via the DMS Report Archive Setup).
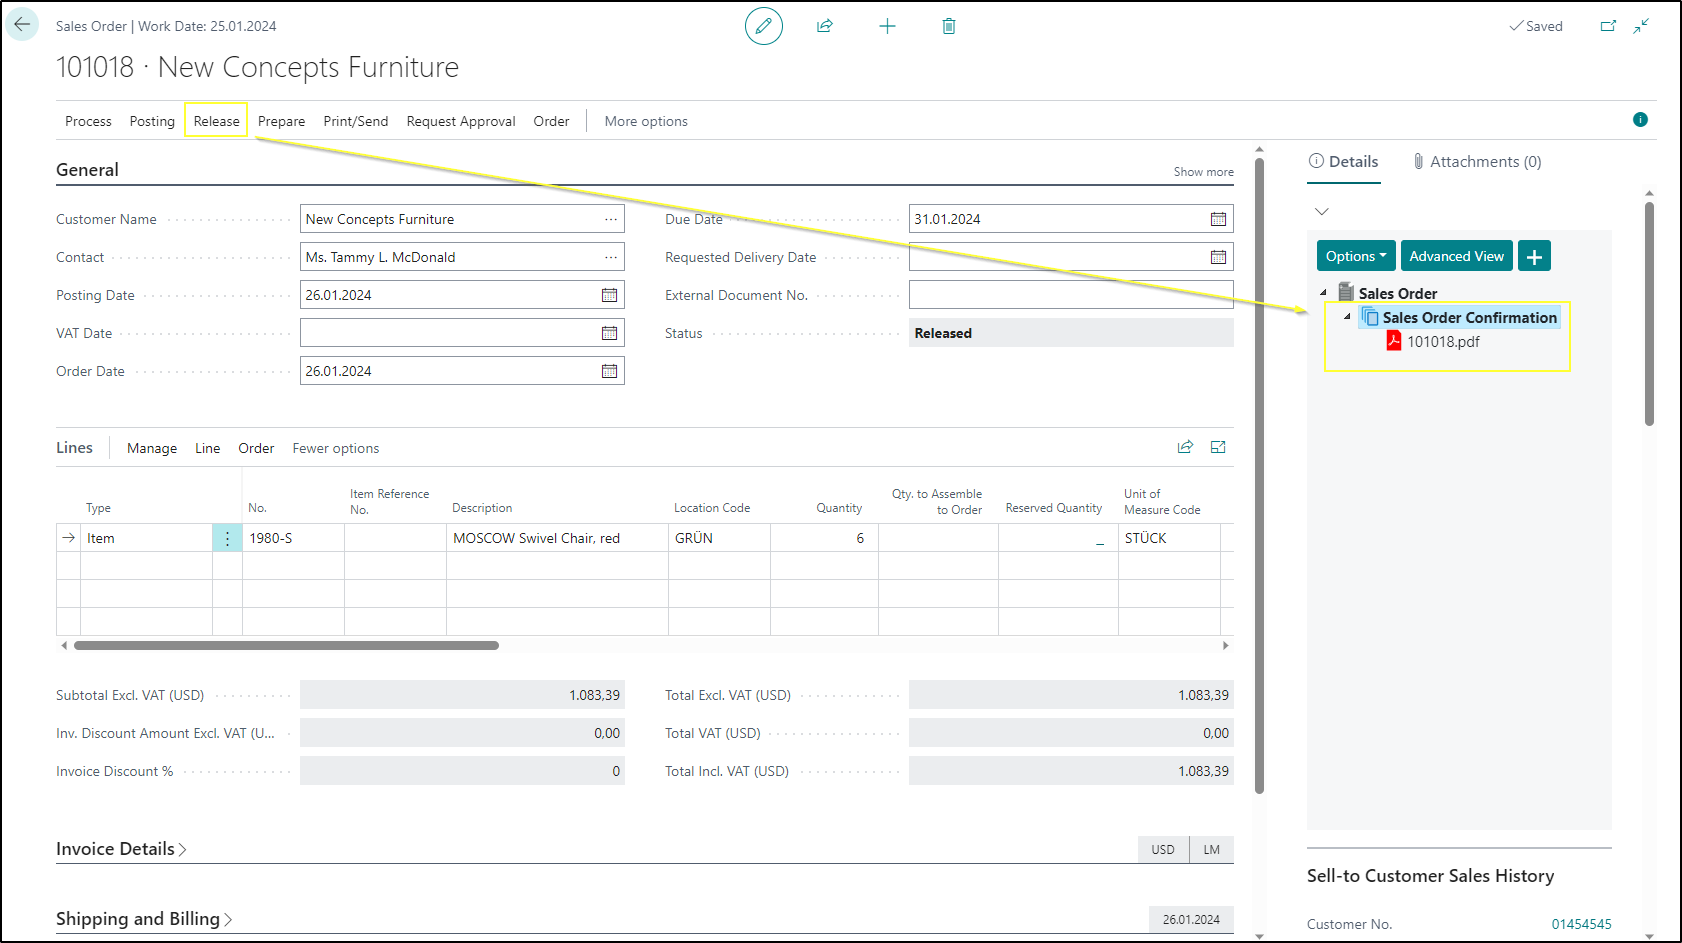
Structure of the Dropform


The DMS Infobox is made up of the following components:
-
Action Bar - this provides several buttons (from left to right):
- Show more options - this button offers more options in the form of a drop-down menu. The options are explained below.
-
Show sorting options - this button offers sorting options in the form of a drop-down menu:
-
Grouping
- Ascending/descending (Alphabetically) (Toggle) - sorts both grouping levels alphabetically in ascending or descending order
Grouping level
Grouping levels and their combinations are explained further down on this page.
-
Documents
- Ascending/Descending (Last modified at) (Toggle) - sorts the documents in ascending or descending order according to their "Last modified on" property
- Ascending/Descending (Created at) (Toggle) - sorts the documents in ascending or descending order according to their creation date
-
-
Open Advanced View - opens the advanced view in a new BC window.
- Upload document - opens a file storage as a dialog window. A file can either be dragged there directly or selected from the local computer. Multiple files can also be selected and uploaded simultaneously (see Multiple File Upload).
-
Search field - enables document search within the DMS Factbox.
Searching
- The search is based on the complete document display text. This means you can also search for file name extensions (file types) or document status.
- The file contents cannot be searched via the search field.
-
Display/Upload Area - this area takes up the most space in the DMS Factbox. Your DMS documents and, if applicable, their workflow status are displayed here. Depending on your personal preferences, they are grouped in one or two levels and sorted chronologically. The entire DMS Factbox also acts as an upload area, allowing documents to be easily uploaded using drag-and-drop.
Multiple File Upload
In the DMS Dropform, multiple files can be uploaded simultaneously – both via drag-and-drop and via the upload dialog.
- Drag-and-Drop: Select multiple files in File Explorer and drag them together into the DMS Factbox.
- Upload Dialog: Click the [Upload document] button. In the dialog that opens, you can select multiple files and upload them in a single step.
If metadata is requested when uploading multiple files (e.g., via a BC Lookup), a separate dialog for entering the metadata will appear for each file.
Extracting ZIP Files
If the option Extract ZIP files on upload is enabled in the DMS Setup, ZIP files are automatically extracted when uploaded via the DMS Dropform. The files contained within the ZIP file are uploaded individually to SharePoint — the ZIP file itself is not stored.
This applies both to uploads via drag-and-drop and via the upload dialog.
Metadata
If metadata is requested for the contained files, a separate dialog will appear for each individual file.
More options (drop-down menu)
The drop-down menu is divided into several action categories using headings:
- View
- Show all/less documents (Toggle) - shows all or fewer DMS documents in the DMS factbox. The visibility limit can be set on the DMS SharePoint Setup page. It applies per (currently deepest) grouping level.
- Expand/Collapse all levels (Toggle) - expands or collapses all grouping levels.
- Group Settings (Dropdown) - provides settings for the grouping levels.
- First grouping level
- Year - groups the documents by the year they were last modified. The second grouping level here is the content type.
- Year and Month - groups the documents by the year and month they were last modified. The second level here is the content type.
- Content Type - groups the documents according to their content type. The second level here is the year.
- Library - groups the documents by library. The second level here is the folder structure.
- Table Setup (Code) - this is the legacy/default setting. The documents are grouped according to their table setup. The second level here is the folder structure, or if this is not set up - the content type.
- Table Setup (Description) - groups the documents according to the description of their table setup. The second level here is the content type.
- Second grouping level
- Show/Hide (Toggle) - shows or hides the second grouping level.
- First grouping level
Context menu
Right-clicking on one of the uploaded documents opens up a context menu with the following functions:
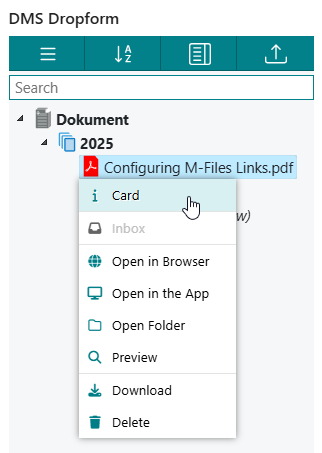
- Card: opens the document card.
- Inbox: opens the inbox entry for the document.
- Open in Browser: opens the document in SharePoint Online.
- Open in the App: opens the document in the default app for the file type.
- Open Folder: opens the SharePoint folder in which the file is located. The action is only active if the folder already exists in SharePoint.
- Preview: opens the advanced view and displays the document in the document preview. The action is deactivated for unsupported file types.
- Download: downloads the file.
- Delete: deletes the file.
Overview of the grouping levels
| 1. Grouping level | AL Format | Example | 2. Grouping level |
|---|---|---|---|
| Year | <Year4> | 2024 | Content Type |
| Year and Month | <Year4>-<Month,2> (<Month Text,3>.) | 2024-01 (Jan.) | Content Type |
| Content Type | Text | Sales Invoice | Year |
| Library | Text | SALES | Folder Structure |
| Table Setup (Code) | Text | SALES | Folder Structure resp. Content Type |
| Table Setup (Description) | Text | SALES | Content Type |
Settings
Settings in Business Central
-
(Global) Standard Action for Documents - The Standard Action setting defines what happens when clicking on a document inside the DMS FactBox. The global standard action can be configured in DMS SharePoint Setup and applies to all users automatically. Should you wish to configure this differently for certain users, it is possible to adjust this in DMS User Setup.
- Preview - opens the document in the Advanced Document View within Business Central.
- Open in the App: opens the document in the default app for the file type.
- Open in Browser: opens the document in SharePoint Online.
- Open Folder: opens the SharePoint folder in which the file is located.
Not executable action
If the action cannot be executed due to the document or folder status, or the file type, the background of the document in the dropform briefly turns red.

Settings in the web browser
The following DMS Factbox settings are stored user-specifically in the browser cookies. This means that each user can select the settings that suit them best or that they are most comfortable with.
- Show all/less documents (Toggle)
- Expand/Collapse all levels (Toggle)
- Grouping settings - both the selected grouping level constellation and whether the second grouping level is shown or hidden are saved.
- Sorting settings - the sorting settings for the grouping levels as well as for the documents are saved.
Cookies
Please note that depending on your web browser settings, cookies may be deleted. This can happen, for example, when closing the web browser. If you delete the cookies manually, the user-specific settings will also be reset. If you notice that the settings have not been saved or have been reset, check your web browser settings.